Creating your Restaurant Branch
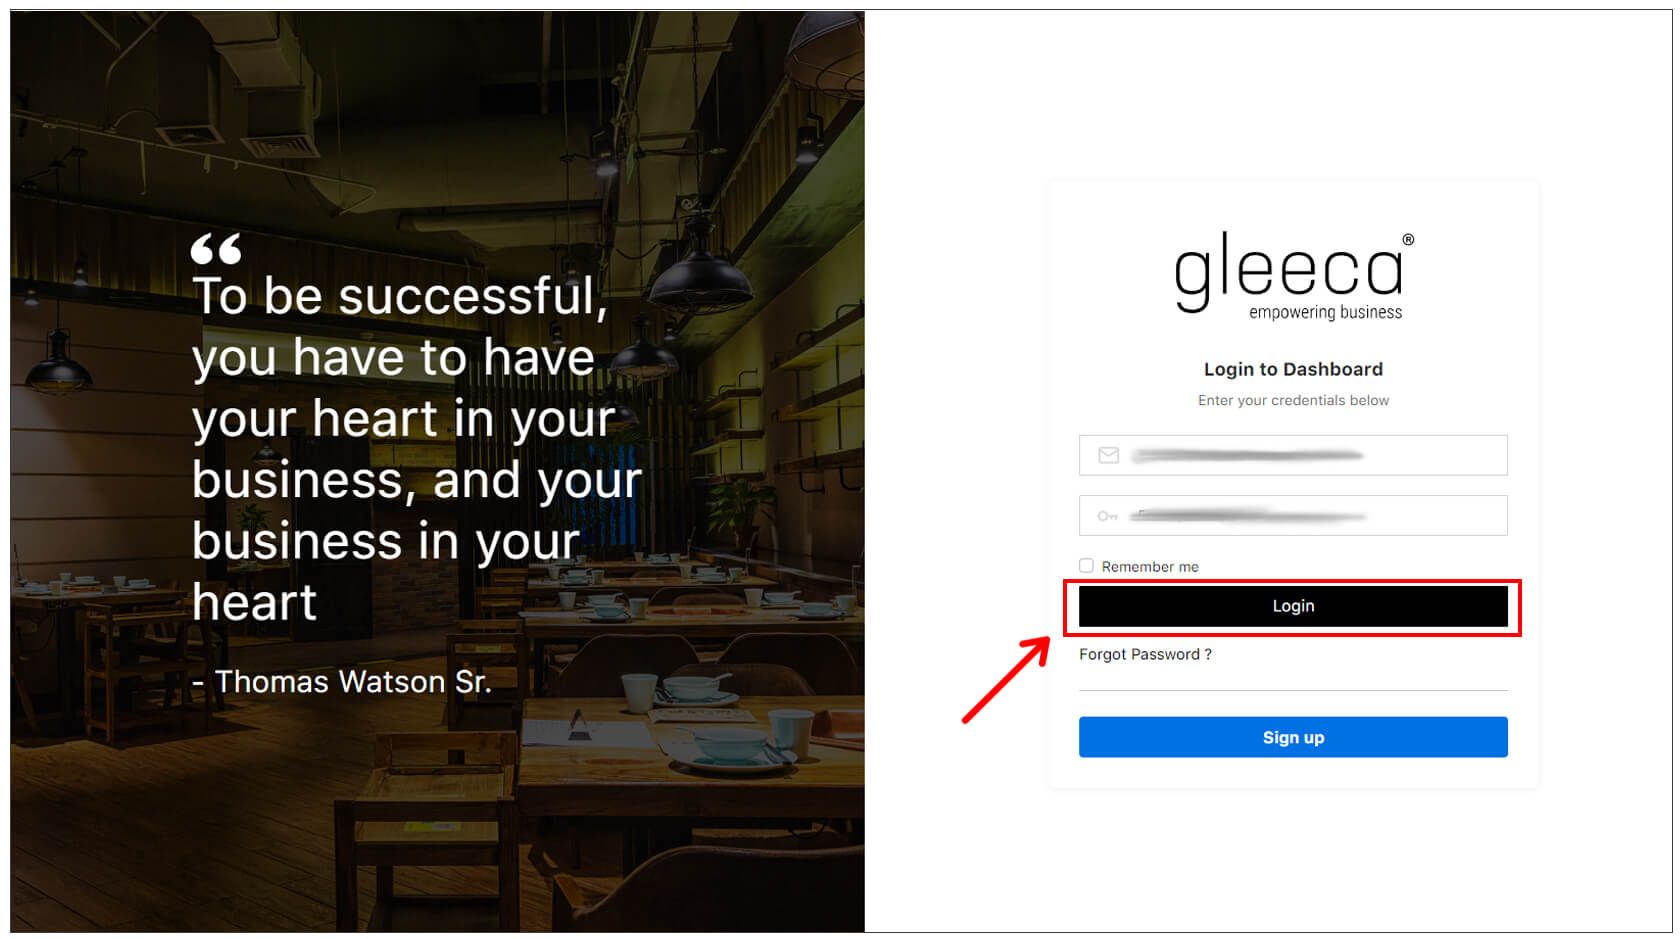
Step 1: Log in to your Gleeca Account
Once you have signed up and taken a Gleeca Paid Subscription/Trial, either the system will immediately redirect you to the dashboard, or you have to log in to your gleeca account.
Step 2: Create Branch
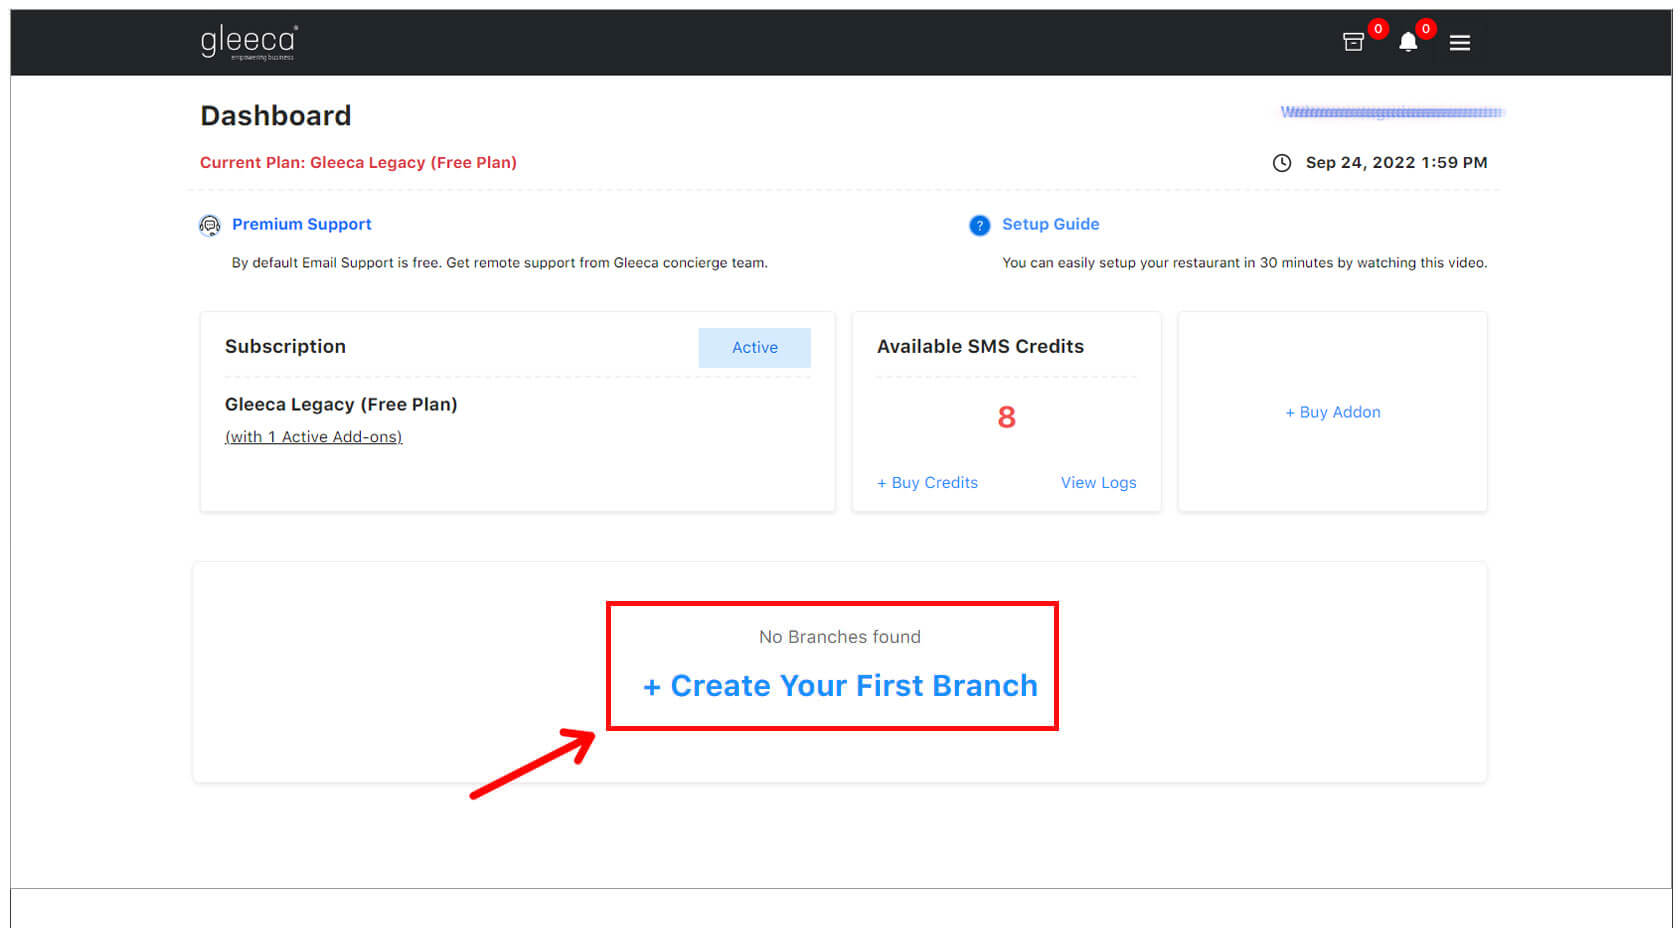
Click the “Create your first branch” link and enter your restaurant’s basic information.
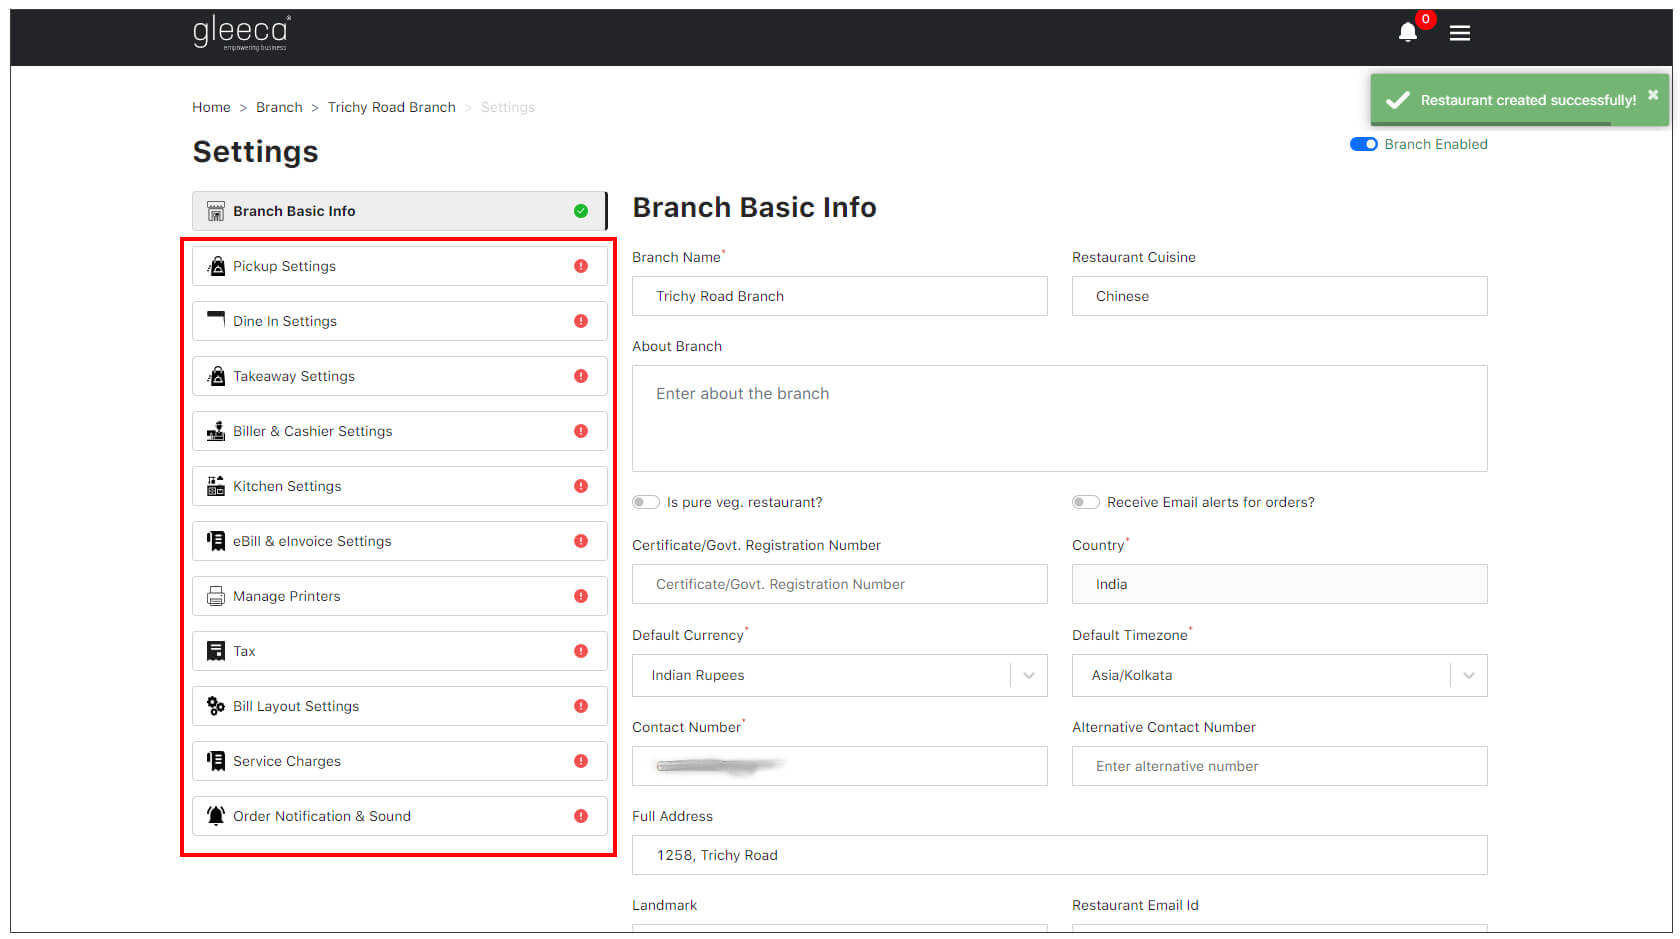
You should mention the name of your branch, basic introduction about the branch, and other details such as Vegetarian Restaurant or not, Government registration certificate number, address, Time zone, branch manager contact number, alternative contact number, and email address to send alerts related to the branch, restaurant photos, etc.
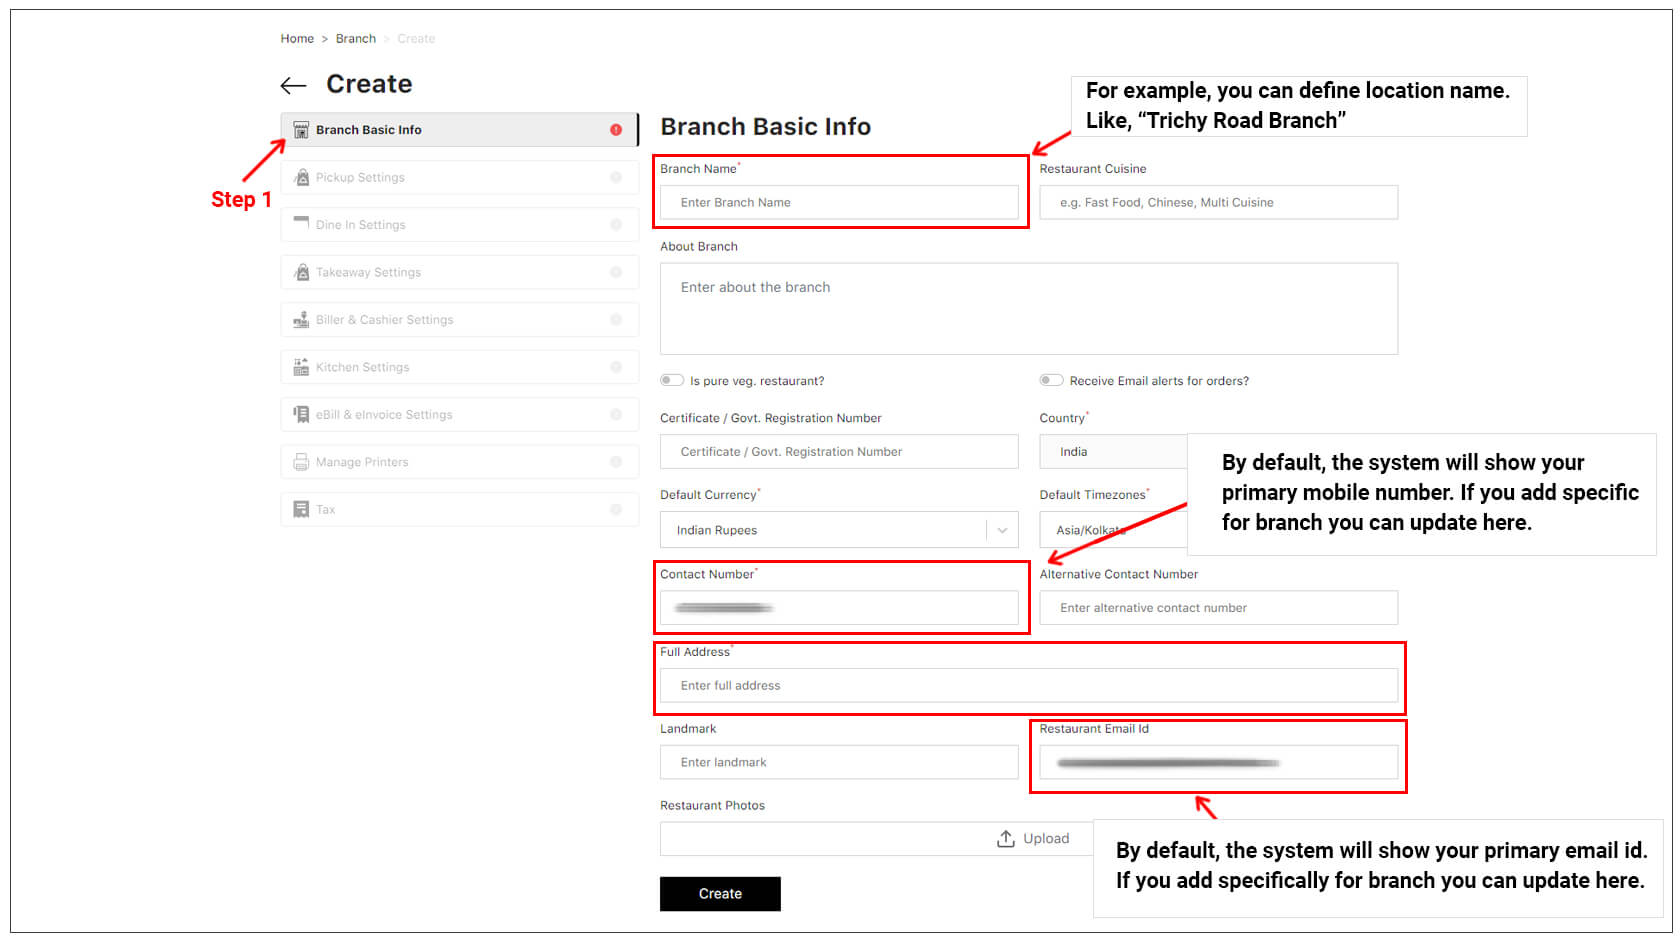
Once you click the “Create” button, You will see the success message “Restaurant Created Successfully“.
Now you need to focus on configuring other settings as per your business model.
Do you know where your Custom URL link is located?
Once you configure the first step in Branch Settings, Gleeca System will publish your website immediately, where your customers can order online. If you remember your Unique URL, which you have blocked while registering, you can open the page in the browser by typing in the address bar. You can even access your custom URL by clicking the menu button in the top right corner.


Please visit Onboarding Checklist for more information.
I hope this article is helpful to you.
Please Note: If you want to add more than one branch, you should buy a license using our Additional Branches Add-on for each additional branch.
